Dinner By Dagny

Not just food, food with flavor

Archive for the category “Casseroles”

Cornish Hen Pot Pie

My husband asked my cousin to volunteer on election day and in exchange I promised I would cook whatever she wanted for dinner the night before and we would start the day (at 5am) with mimosas.  She requested baked cornish hens with my mother in laws biscuits.  This is just not something she gets everyday, cooking for just herself.  Although when we started talking about it, she realized that this would be the perfect size for one – you get two meals out of it and you get a little bit of everything – skin, breast meat and dark meat.  For those that don’t know, cornish hens are little chickens that weigh about 2-3 pounds. They are perfect for one or two people, but they are also quite good. I usually bake them whole, seasoned just like a chicken.  After agreeing to cook this meal, I realized I actually had something to do that night and my cousin and daughters would get to enjoy it all themselves.  Since I had cooked 4 cornish hens, expecting my kids to eat a lot, and then needing 1 1/2 for the adults, I ended up with quite a bit of leftovers.

My cousin inspired me further when she told me that she hadn’t ordered chicken pot pie in a restaurant the previous weekend because she was anticipating this meal.  It seemed like the perfect way to use my leftovers.  Especially since I also bought a 1 pint of buttermilk, as the smallest container they had, and needed to use that as well.

Ingredients

2 cups all purpose flour
4 tsp baking powder
1/2 tsp salt
1 stick (1/2 cup) unsalted butter
2/3 cup buttermilk (regular milk is fine)
1 egg beaten
2 cups cooked cornish hen (or chicken), cut or pulled into pieces
2 carrots diced
2-3 potatoes
*for white bechemel sauce
2-3 tablespoons butter
2-3 tablespoons flour (equal amount as butter)
2-3 cups heated milk

Sharon’s Biscuit Directions
*courtesy of my mother in law

1. Mix flour, baking powder and salt
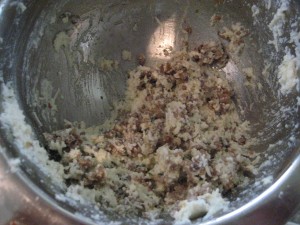
2. Cut in butter until crumbly
3. Stir in egg and buttermilk
4. Knead in floured surface 10-12 times, working flour into dough
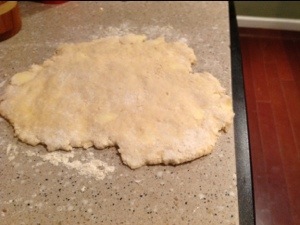
5. Roll out dough

20121118-161715.jpg

Pot Pie Directions

1. Melt butter in medium saucepan
2. Whisk in flour
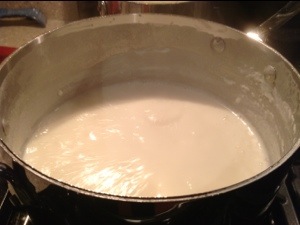
3. Heat milk and add to roux 1 cup at a time, whisking until smooth
4. Bring to a boil, reduce to simmer for 10 mins (give your béchamel time to thicken)

20121118-161649.jpg

5. Meanwhile peel, cut into 1/2 inch pieces, and par-boil carrots and potatoes
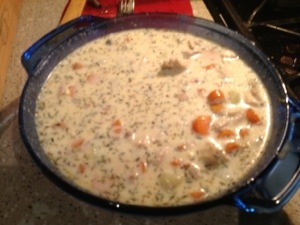
6. Add poultry, potatoes, carrots, potatoes to béchamel
7. Add garlic, thyme, oregano to season
8. Pour filling into baking dish

20121118-161641.jpg

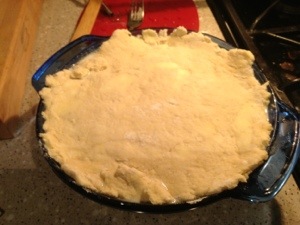
9. Lay biscuit dough on top

20121118-161635.jpg

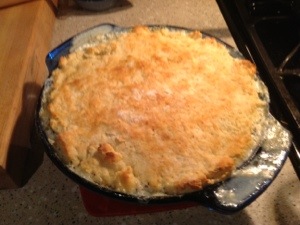
10. Bake for 12-15 minutes until biscuit is golden brown
11. Remove from oven and let stand for 10 minutes

20121118-161627.jpg

Results

I was mostly pleased with my results.  The biscuit topping was very good, and the filling was incredibly flavorful.  Unfortunately I was not very patient with my bechemel sauce and therefore it was a bit thin.  It didn’t impact the flavor or experience at all, and definitely didn’t impact my daughter’s desire to eat for leftovers over the next couple of days – afternoon snack, leftover dinner night, pre-hockey dinner – whenever she could get it.
Baked Chili Rellenos

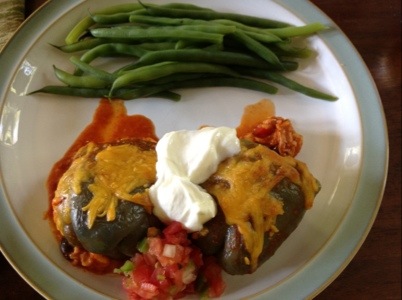
The last time I made green chili salsa for enchiladas, I had a lot of leftover sauce.  Instead of using it on another batch of enchiladas, I decided to branch out.  I came up with the idea to make chili rellenos with the green chili salsa.  Traditionally, it’s made with a red chili sauce, but the filling is pretty flexible.  My hunt for poblano peppers was a little difficult in my regular grocery store.  I picked up 10 on the smallish side.  I’m sure I would have gotten larger ones, and had a better selection at a Hispanic market or the International Food store, but that didn’t work into the schedule.

One of the first things I learned when looking for a recipe is that chili rellenos is usually battered and fried.  I apparently had selectively forgotten that.  After searching for baked variations, I most closely referenced this one.  I used ground turkey and queso blanco, but you can really fill these with anything you want.

Ingredients

10 medium poblano peppers

1 lb ground turkey

1 lb queso blanco

1 medium onion, chopped

2 1/2 – 3 cups green chili salsa

Adobo, cumin, oregano to taste

Directions

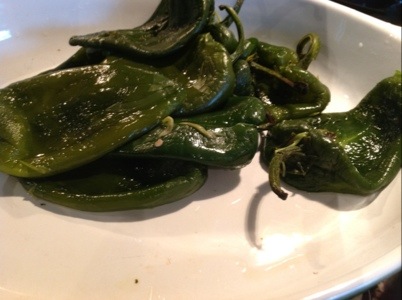
1.  Char chilis under broiler on each side until blistered (~approximately 5 mins per side)

2.  Remove charred chilis from pan and place in sealed plastic bag.  Let stand for 15 minutes.

3.  Remove skin from chilis. (I prepared the chilis the night before)

20120819-150500.jpg

4.  Remove the stems and as many of the seeds as you can.  Cut a slit about an 1 inch long so that you get to more of the seeds and stuff them.

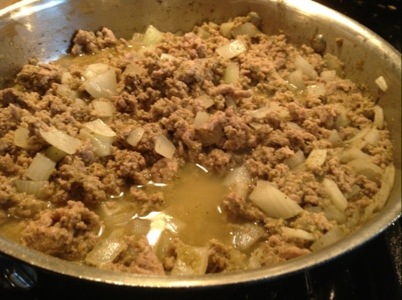
5.  Prepare filling by browning turkey with chopped onion.  Season to taste.  Add about 1/2 – 1 cup of green chili salsa to the turkey

20120819-150509.jpg

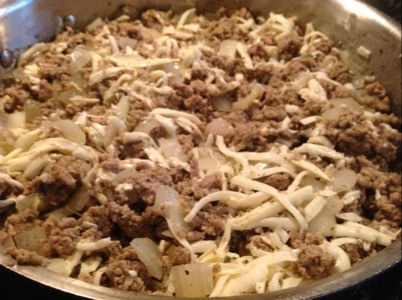
6.  Shred queso blanco and use about 1/2 to stir into the meat mixture.

20120819-150516.jpg

7.  Spread 1 cup of green chili salsa on bottom of pan.  Stuff peppers and layer on top.

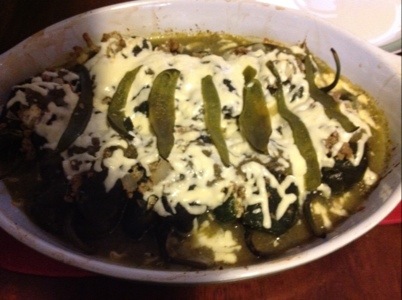
8.  Drizzle remaining green chili salsa on top of peppers, sprinkle with remaining cheese.

10.  Bake for 20-25 minutes on 375 until cheese is melted, sauce is bubbling and there are brown spots.

20120819-150532.jpg

Results

We really enjoyed this meal.  Next time, I think I would use a “mexican” blend cheese to add a little sharpness to the flavor.  But it is definitely an easy meal that allows me to substitute as I see fit.

Enchilada Peppers

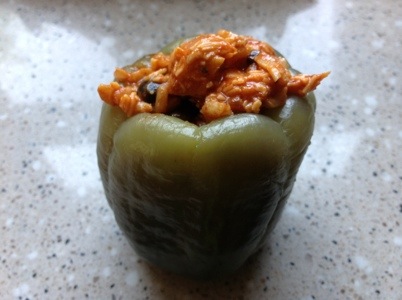
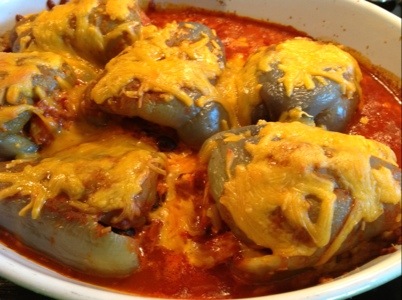
I went to the Kingstowne farmer market on Friday and got all sorts of goodies, including these royal purple bell peppers. I latched on to stuffings these peppers, but my family isn’t a real fan of stuffed peppers. My initial thought was to make a hash with a lamb sausage, potato and red pepper hash. I scrapped that idea when I couldn’t come up with a good sauce for it. I then thought about my enchilada filling. My youngest daughter liked the idea and even named my dish “enchilada peppers.”

Ingredients

5 small purple bell peppers

1 package southwestern chicken shortcuts, broken into bite size pieces

1 can black beans, rinsed and drained

1 package 90 secs brown rice

1 large can enchilada sauce

3 cups shredded cheddar cheese

1 small onion diced

1/2 red pepper diced

6 tortillas

Directions

1. Carefully cut out stem of peppers and remove seeds and white membrane

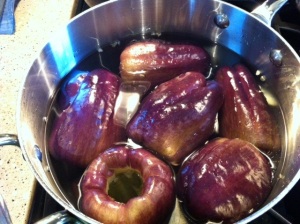
2. Place peppers in pot and cover with water. Bring to a boil and boil for 5-10 minutes until soft

3. Remove from pot and let drain

4. Sauté diced onions and red peppers in a little olive oil over medium high heat

5. In large bowl, mix chicken, rice, cheese, black beans, onions and red peppers and about 1/2 enchilada sauce (enough to make mixture moist but not soupy)

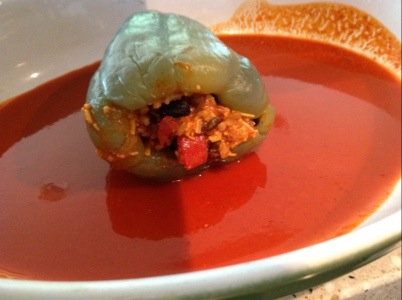
6. Pour some enchilada sauce on bottom of baking dish

7. Use a tablespoon to stuff peppers

20120610-205305.jpg

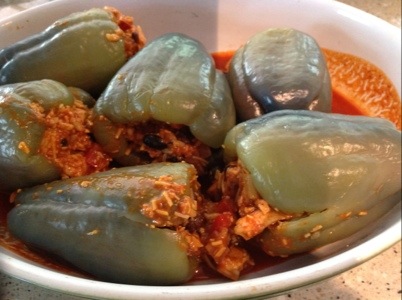
8. Lay peppers in baking dish. Don’t over-crowd peppers

20120610-205533.jpg

20120610-205553.jpg

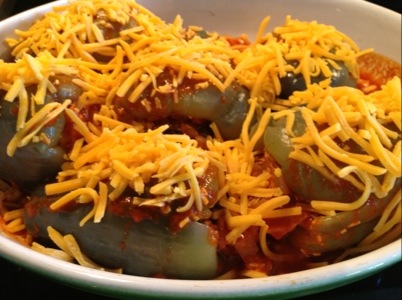
9. Drizzle peppers with enchilada sauce and cover with cheese

20120610-205752.jpg

10. Use remaining filling for traditional enchiladas, rolling it in tortillas, cover in enchilada sauce and cheese

11. Bake peppers and remaining enchiladas at 375 degrees for 25 minutes

20120610-205956.jpg

20120610-210021.jpg

Results

These were a winner and a requested “definitely make again” recipe. I was a little weirded out by why the peppers blanched to green, but it didn’t alter the taste.

Baked Arroz con Pollo

This is simply spanish style chicken and rice. In the Caribbean, it’s known as seasoned rice. I took the basic recipe off the back of the Goya pigeon peas can and made some modifications. I used brown rice, as that’s generally what I have in my kitchen these days. I also did most of the cooking in the oven. I took what I learned from the baked rice pilaf recipe and made it work for this. I figured that this was a more traditional approach to it, as the West Indians use banana leaves to help steam the rice.

Ingredients

1 tablespoon olive oil

5 bone-in chicken thighs

1/2 cup diced green pepper

1 small onion diced

2 packets Sazon Goya seasoning packets

2 garlic cloves minced

1 tsp oregano

1 can pigeon peas

1/2 cup tomato sauce

2 cups brown rice

3 cups water

Directions

1.  Heat olive oil in large saucepan over medium high heat

2.  Preheat oven to 375 degrees

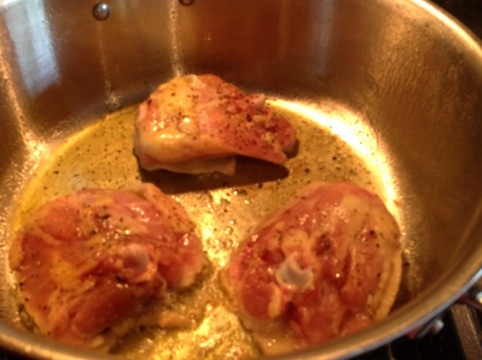
3.  Brown chicken thighs.  Brown in batches as needed.  Do not crowd pan

20120528-185833.jpg

4.  Set chicken thighs aside to drain (on paper towel lined plate)

5.  Remove any excess oil/fat from pan, leaving about 1 tablespoon

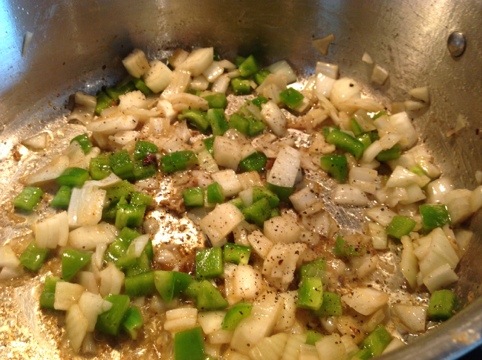
6.  Saute onions and peppers for 3-4 minutes

7.  Add garlic and saute 2-3 more minutes

20120528-185841.jpg

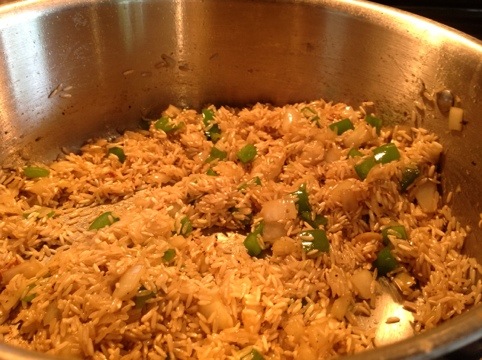
8.  Add brown rice and cook for a few minutes, until rice becomes aromatic (smells nutty)

20120528-190000.jpg

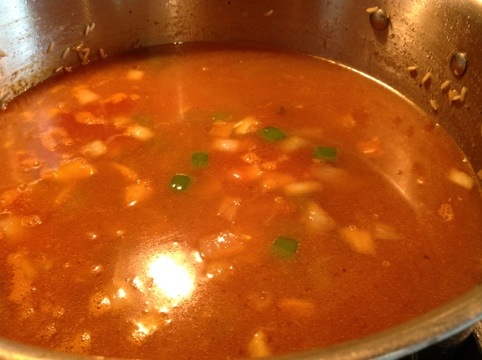
9.  Add water, pigeon peas (and liquid), tomato sauce, sazon, and oregano and bring to a boil

20120528-190010.jpg

10.  Add chicken thighs

11.  Cover with moistened dish towel and place lid on top.  Fold over corners of dish towel

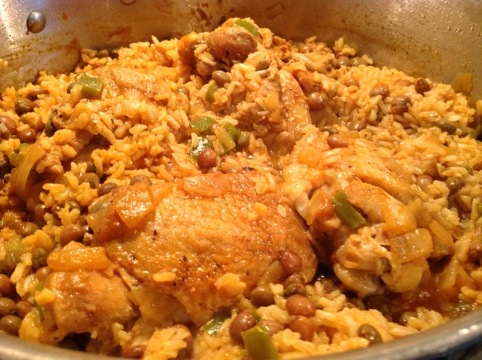
12.  Bake for 50 minutes

13.  Remove from oven and let sit for 10 additional minutes before removing the cover.  Stir before serving

20120528-190017.jpg

Results

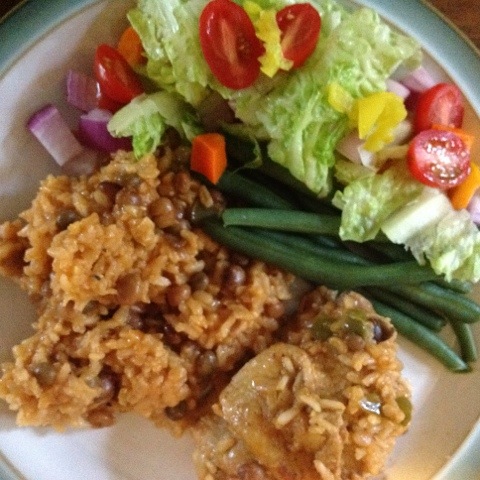
20120528-190027.jpg

This was paired with green beans and fresh salad.

Macaroni & Cheese

Macaroni & Cheese is the quintessential comfort food.  Homemade baked macaroni & cheese was a staple in my house growing up, and is definitely a staple in my house for barbecues, parties or just dinner. I never had boxed mac n’ cheese (if you can call processed orange powder cheese) until I was in high school and was babysitting for a kid.  I was expected to serve it for dinner.  I’m a big believer in trying food before making kids eat it.  Needless to say, I have had quite a few unpleasant experiences.

There are hundreds of ways to make macaroni & cheese by simply changing up the cheese, adding bacon or lobster or garlic; making a béchamel sauce and melting the cheese into that; topping it with breadcrumbs, etc. I have to say, mine is pretty simple.  And based on how quickly it goes, it seems to be enjoyed by all.

Ingredients

1 box medium whole wheat shells (traditionally it’s made with elbow macaroni, but I tend towards these)

3 cups shredded cheddar cheese (sharp, medium, 3 cheddar blends all work equally well.  I prefer to use cheddar as it gives it a bite.  I find that the mac n’ cheese blends that include swiss and american tend to be more mild)

1/2 stick butter

1 can evaporated milk (fat free works as well as regular)

1 cup milk

salt & pepper to taste

Directions

1.  Preheat oven to 350 degrees

2.  Cook pasta according to package directions to the minimum cook time.  The pasta will continue to cook in the oven so you want it closer to underdone than overdone

3.  Drain pasta and pour into casserole dish

4.  Stir in butter until it melts

5.  Add in 2 cups cheese and mix thoroughly

6.  Add evaporated and regular milk and mix

7.  Add salt & pepper to taste

8.  Sprinkle remaining 1 cup cheese on top

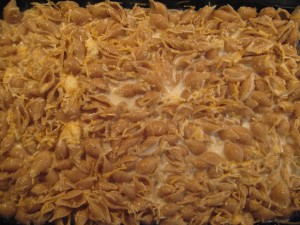
9.  Bake at 350 degrees for 45 minutes

10.  Let rest for 10-15 minutes before serving

The cheese should all be melted and there should be crispy pieces along the edge.

Lasagna Rolls

My kids asked for lasagna to make it onto the menu this week, and since it’s spring break, I obliged.  The caveat is that they had to help.  Unfortunately, my older daughter wasn’t feeling to well so she couldn’t help and my younger daughter helps on her own time, in her own way.  I tried to convince them to do a simple cheese lasagna, but they insisted that sausage should be added.  They could eat sausage every day of the week if they were allowed.  I try to provide a more balanced menu.

I found this recipe from Giada DeLaurentiis for lasagna rolls and thought that it seemed pretty simple and tasty and decided to give it a try.  My instinct told that these rolls didn’t need an entire lasagna noodle each and that the 35 minutes at 450 degrees seemed a little excessive.

Ingredients

2 cups marinara sauce

1 container ricotta (15 ounces – I used fat free, but you can use whole milk or part skim as you like)

1 cup plus 2 tablespoons parmesan cheese (shredded or grated)

8 ounces sausage, browned and crumbled

1 large egg

3/4 teaspoon salt, plus more for salting water

1/2 teaspoon pepper

1 tablespoon parsley

18 uncooked lasagna noodles

1 cup shredded mozzarella

1 – 2 tablespoons olive oil

Directions

1.  Cook lasagna noodles in large pot of boiling water with salt and olive oil.  Cook for the minimum time per the directions on the specific brand of lasagna noodles your using.  Drain and set aside.  Laying the noodles in a single layer on a baking sheet prevents them from sticking

2.  Brown sausage meat, breaking into crumbles as it cooks.  Drain on a paper towel and let cool for 5-10 minutes.

3.  Mix together ricotta, parmesan, parsley, egg.  Mix in crumbled sausage.  Add salt and pepper to taste.  (I ended up doing this halfway through my preparation, but I would recommend doing this from the beginning)

3.  Preheat oven to 450 degrees

4.  Cover bottom of casserole (13 x 9) dish with 1 cup marinara sauce

5.  Lay out lasagna noodle on a work surface, then spread a large spoonful (about 3 tablespoons worth) of ricotta mixture on it.  Roll like a jelly roll and lay the lasagna rolls seam side down in the casserole dish.  Repeat until the casserole dish is full and ricotta mixture has been used
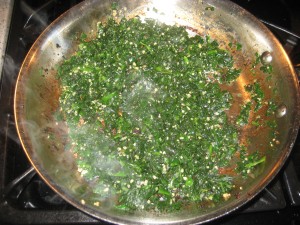
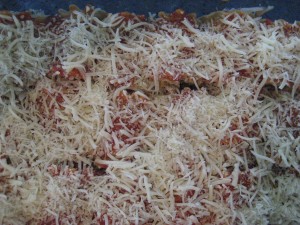
6.  Spoon marinara sauce over top of rolls and sprinkle with the mozzarella and remaining parmesan cheeses

7.  Bake covered at 450 degrees for 20 minutes.  Uncover and cook for another 15 minutes.  Let rest for 10 minutes.

Serve it with a little extra sauce and parmesan cheese.

Results

They seemed to have been enjoyed, however the one complaint is that they were hard on top.  When I talked to my dad about it, he said that this had always been a running discussion between my mom and him…to bake at a high temperature and get the cheese nice and crusty or bake at a lower temperature for a longer time period.  I realized when I was writing this that I didn’t spread the cheese over the entire noodle as the original recipe said.  Next time I will definitely do this.  I think I will also lower the temperature.


Lasagna

Growing up in an Italian family, I have fond memories of sauce simmering on the stove for hours and those special occasions where we would make lasagna or manicotti.  It was usually all day affair between the sauce and the homemade meatballs.  I made homemade sauce recently and had a pretty hefty amount leftover, so decided this was as good as any time to use it for lasagna.  As an adult, I’m no longer interested in spending the time to make handmade lasagna by myself, and since I was making this during the school day, none of my kids were around to help, so I decided that I would use ground sausage.  I also decided that I was going to use spinach in half of it, since my husband and I enjoy it but it isn’t a favorite of my kids.

Ingredients

1 pound ground sausage

1 package lasagna noodles (I used Ronzoni Healthy Harvest Whole Grain Lasagna Noodles) – I used 12 noodles

4 cups sauce

1 15 ounce container of ricotta cheese

2 cups mozzarella

2 eggs

8 ounces cut leaf spinach

1/2 cup parmesan cheese

1-2 tablespoons parsley

1-2 tablespoons olive oil

2 tablespoons minced garlic

Directions

1.  Preheat oven to 350 degrees

2.  Brown off ground sausage in medium size pan, breaking up meat with spoon as it cooks

3.  Set browned sausage aside to rest and drain fat on a plate layered with a paper towel

4.  Using the same pan, saute spinach with minced garlic. Add a little bit of olive oil to the pan if necessary

5.  Meanwhile, in medium bowl mix ricotta, 1 cup mozzarella, 2 egss, 1/2 cup parmesan, parsley and salt and pepper to taste

Note: Check the label on the lasagna box to determine whether the noodles are oven ready.  You may have to pre-cook the noodles before assembling.

6.  Assemble the lasagna by layering 1 cup sauce, 1/3 cheese, 1/3 sausage, 1/3 spinach (I added the spinach on only 1/2 the lasagna).  Repeat until all cheese, sausage and spinach have been added.

7.  Layer last 3 lasagna noodles with 1 cup sauce and 1 cup mozzarella

8.  Bake covered at 350 degrees for 45 minutes, then remove cover and bake for additional 10 minutes

9.  Let rest for about 10 minutes before serving

The results

As expected, the results were great.  This happens when you start with good ingredients.  It looked so good that my neighbor opted to take a piece of the fresh baked lasagna, rather than the pulled pork or chicken pasole soup leftovers she thought she came over for.

Substitutions

Lasagna is another dish that can easily be modified.

  • Inspired by Giada De Laurentiis, you could roll the filling in the individual noodles after cooking them and get individual lasagna rolls, for easy serving and presentation.
  • You could add more vegetables like zucchini, squash, eggplant for a primavera lasagna
  • You could add pepperoni, meatballs, ground meat, chicken or any other meat that interests you

Chicken Enchiladas

This is a definitely a family and friends favorite.  Our friend Derek has been asking me for a real recipe for years now, but I’m only just getting around to it.  Part of this has to do with the fact that I view cooking as a creative process, based on what’s in the cupboard and what I’m feeling a craving for.  That really doesn’t make it easy to replicate successful recipes, nor does it make it easy to articulate one to your friends, who are anxious to duplicate it.

Enchiladas are tortillas, rolled around a filling, covered with sauce.  Beyond that, it is wherever your whims take you.  Now the recipe below is one that my children and some friends favor, but everything is up for interpretation.  Do you use corn or flour tortillas? Chicken, beef, turkey or pork? Black beans or refried? Vegetables? Traditional or green salsa, enchilada sauce or mole?  This is all up for discussion.  My cousin Cait took my base recipe and regularly mixes it up with ground beef or turkey, sour cream, peppers and onions (see Cait’s recipe, which my Poppa John declared better than mine).  These simple changes can give a whole new taste to dinner.  Once I outline the core recipe for my chicken enchiladas, I’ll give you some ideas for substitutions.

Ingredients:

1 package chicken breast shortcuts

1 Uncle Ben’s 90 second whole grain brown rice (or 1 cup cooked rice)

1 can black beans (15.5 ounces) drained and rinsed

~8 – 12 tortillas (I use soft taco flour ones, but the number you need depends on what size you use and how much filling you put in)

~4 cups shredded cheddar cheese

2 – 3 can enchilada sauce (28 – 42 ounces)

Directions:

1.  In a large mixing bowl, add chicken shortcuts and break any larger pieces into bitesize pieces

2.  Add uncooked rice (if using 90 second variety), black beans drained and rinsed, and 2 cups shredded cheese and mix

3. Add about 2 1/4 cups enchilada sauce and mix.  You want the filling moist but not soupy

4.  Pour some enchilada sauce into 9×13 casserole dish, enough to cover bottom

5.  Heat tortillas 3 at a time in microwave 20-25 seconds

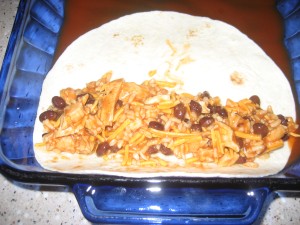
6. Add 2-3 spoonfuls of filling and roll tortilla around and position in pan, seem-side down.  Repeat until all filling is used up

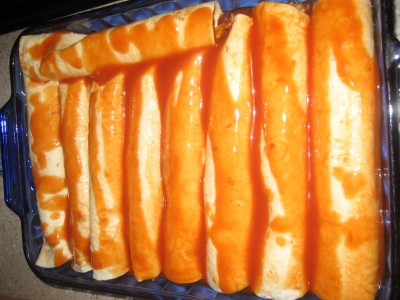
7.  Pour remaining enchilada sauce on top of tortillas

8.  Cover enchiladas with cheese, as much or as little as you like.  I used about 2 additional cups

9.  Bake at 375 degrees for about 25 minutes, until the cheese is bubbly and the enchiladas are heated all the way through

Substitutions:

As I mentioned earlier, everything in this recipe is up to the cook’s discretion.  I have made the following modifications:

  • Corn tortillas – I actually really like the flavor of corn tortillas and these are more traditional, but they are harder to work with.  Unless super fresh, they tend to break
  • Salsa in addition or in substitution for enchilada sauce
  • Add sautéed onions and peppers to the filling
  • Shredded cheese blends instead of just cheddar. You could also use queso fresco.
  • Green salsa instead of mild red enchilada sauce – This is a real hit as well, but tends to be much spicier so my kids prefer the traditional one.  I only started doing this recently as I wasn’t ever pleased with the flavor of store bought green salsa.  I finally had an epiphany when I realized that I could use store bought green salsa as a base and then add some enhancements.  I purchase two green salsas, one jalapeño based salsa like Mrs. Renfro’s and another tomatillo based salsa like Desert Pepper or just the store brand, mix them in the blender with some garlic cloves, fresh cilantro and another jalapeño.
  • Use leftover mole chicken – I made a mole sauce out of a previously made barbeque sauce, cocoa powder, tomatoes, dried chilies and some leftover patak’s red curry paste.  It turned out great, but I had lots of leftovers, which I ended up using in the enchiladas.  These were declared a success as well.

As you can see, enchiladas are pretty simple once you get the basics down and allow you to shine with your own creativity.

Post Navigation